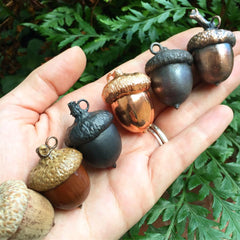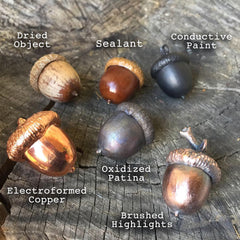

For Electroforming Starter Kit with Acetone Based Conductive Paint only!!
(If you purchased a Kit at Maker Faire San Diego 2018- Click here for the alcohol based paint tutorial)
(Click here for a tutorial using a water based conductive paint)
::::::::::::::::::::::::::::::::::::::::::::::::::::::::::::::::::::::::::::::::::::::::::
Step 1 - Design & Prep
Step 1b - Preparing Organics
Step 2 - Anchoring
Step 5 - Electroforming
Step 5b - Clean Up
Step 6 - Polishing, Patinas & Finishes
Step 7 - Preventing Oxidation
Tips & General Guidelines
Health & Safety Information
:: Overview ::
What is Electroforming?
Electroforming* is the electrochemical deposition of metal (in this case, copper) onto an object. An anode (copper) and a cathode (object) are immersed in an electrolytic bath that is composed of a solution of metal salts (Copper Sulphate [CuSO4]).
A direct current (DC) of electricity is passed through the solution via anode(+) and cathode(-), affecting the transfer of metal ions present in solution onto the cathode surface, building up over time and bonding the metal onto the object.
*There is a semantic difference between electroforming and electroplating; both are chemically and procedurally the same from metal to metal, but where electroplating only deposits a very thin layer of metal onto the object, electroforming is intended to build a substantial amount of metal on the object, and in some cases even supplant the object all together, leaving a robust metal shell after the object is removed.
:: Step 1 - Design & Prep ::
Materials needed in this step:
- Piece(s) you want to electroform
- Embellishing elements
- Sketchbook and pencil
Design
When creating design ideas, it can help to sketch out what you want the finished piece to look like. Sketching future designs can also help you get your ambitious ideas all out on the page while you learn and develop your craft. Start with something simple while you are still learning how to electroform.
Popular design mediums are made from crystals, gemstones, leaves, acorns, pine cones, feathers, bone, glass, sculpted clay, metal findings, laser cut or 3-d printed plastic, and of course a mixed media of all these items and more.
Surface Area Calculation
You will need to calculate the square inch of the surface area to be electroformed on your piece. This will come into use during step 5. Keep in mind all sides of the piece.
Here is a square inch calculator to bookmark: http://www.squarefootage.org/square-inches-calculator.php
You’ll be setting your amps at: 0.1 amps x sq inch of surface area.
:: Step 1b - Preparing Organics::
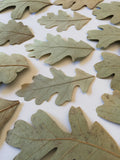
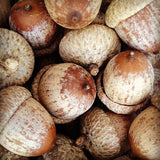

Dry to remove moisture
You will need to fully dry any organic material. This prevents the object from wilting during the prep stages, and also prevents inner rotting of the finished piece.
Press dry
The easiest way to dry multiple batches of leaves is to press dry them in old books, weighted down with something heavy. Typically they are dry after a few days, but it’s best to wait at least a week. A flat iron with a low setting can help speed up this drying process. Keep in mind that even though leaves are flattened and prepped dry with a thin shape- they will regain some natural aesthetic again once they go through steps 3 and 4.
Vegetable Glycerin
To preserve a 3 dimensional object, you can soak your object in a mix of 1 part warm water to 1 part vegetable glycerin in a cup or jar of water for a few days to a week.
You can also experiment with coating your piece in resin to retain its shape(and also acts as a sealant, so you could skip step 3!)
Oven Bake
For fresh acorns, pinecones, wood, etc, bake them on a flat pan or baking sheet on a low temperature(175 - 200 degrees fahrenheit) for about two hours, or until all moisture has been evaporated. Glue the acorn cap on, as they will easily come off after they bake.
:: Step 2 - Anchoring ::

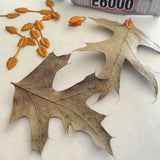
Materials needed in this step:
- Your choice of glue
- Jump rings or another creative form to make an anchor
- Pliers to manipulate the jump ring
- Spring clips or alligator clips to prop your piece up while drying
- Ruler or measuring tape
Supply list with Amazon links: EnchantedLeaves.com/Electroforming
Once you have your design, you may need to attach an anchor to the object as an attachment point for the suspension wire. The anchor is usually a jewelry finding that is incorporated into the design.
Anchor Types
Use a jump ring, formed wire, a charm/pendant that has a loop on it, a fold over or glue on bails, or sculpted clay are just a few examples of different anchors you can use, or something else creative you can think of as a connection to attach to your piece.
Electroforming will add copper onto every surface, so take that into account when designing this part. For example, if you use a jump ring with a small diameter, you may find that after it has been electroformed, the resulting copper may have made the ring’s opening too small for the necklace chain.
Glue
Always be in a well ventilated area when using any type of glue.
E6000 is a multipurpose solvent glue used for jewelry. It will begin to set in about 2 minutes after it’s been exposed to oxygen, and has a working time of about 10 minutes.
Super glue(gel or regular) will also work well to adhere your design. To set super glue instantly, sprinkle a little bit of baking soda over it.
After you are satisfied with your design, let the glue cure at least 6 hours, or overnight before continuing to the sealant and/or conductive painting stage.
:: Step 3 - Sealing ::

Materials needed in this step:
- Sealant/lacquer/varnish
- Small spring clips and/or alligator clips
- Paint brush
- Small cup of water
- Opened large paper clips - turned into an S hook shape
- Drying rack
- A tray, a mat, or plastic sheeting to protect your workspace from any drippings
Supply list with Amazon links: EnchantedLeaves.com/Electroforming
Sealants
Polyurethane lacquer is a great sealant to use. It comes in a liquid or a spray form. You can also use Modge Podge, resin, or clear nail polish(if using a water or alcohol based conductive paint only- NOT a acetone based paint).
Application Methods
When painting with a brush, make thin, even strokes, keeping in mind that any texture may show up in the finished electroformed surface. Lightly thin if necessary by periodically dipping your brush in water between dipping in the sealant. Use small spring clamps and alligator clips to help hold up the piece while painting.
For the dipping method, hook an opened paper clip to the loop of your piece and use the other end as a handle to dip your piece directly into the container of sealant. Hang it on the drying rack and catch any excess sealant that builds up at the bottom or edges of the piece.
When using a spray sealant, hold your piece upright on a combination of alligator clips and spring clamps and spray from about 9 to 12 inches away to ensure an even coat. Work in a well ventilated area that is free from dust and wind.
Drying
Allow your piece to fully dry. If needed, apply additional coats.
Use an opened paper clip to hook your piece to hang dry on a rack. Jewelry or merchandise displays work great as a drying rack. Have a tray, a mat, or plastic sheeting under the drying rack to catch any excess paint drippings.
It is important to let the sealant completely dry before you move on to the next stage. Approximately 24 hours is recommended.
Without a full cure time, you’ll find that painting conductive paint over a layer of sealant that isn’t fully cured will result in a surface texture of many little bubbles or bumps.
When to use a Sealant
If your design is anything organic such as leaves, flowers, pine cones, acorns, feathers, insect specimens, seeds, honeycomb, shell, wood, bone, etc. must be sealed. Sealing will prevent contaminating your conductive paint, and also in your electroforming solution.
Designs that have gemstones may need a sealant, as the electroforming solution will destroy most gemstones. Anything under a 7 on the mohs scale hardness level definitely needs to be sealed. Hardness level of 7 and over(for example, a quartz), usually doesn't need to be sealed, but it’s always better to be safe than to ruin your piece and your electroforming solution.
If your item contains metal(which would make it conductive), you would need to seal it if you do not wish for it to be electroformed over. If the metal type is questionable, then you must seal it to prevent contaminating your paint and your electroforming solution.
:: Step 4 - Conductive Painting ::
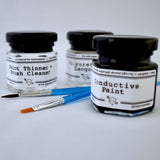

Materials needed in this step:
- Conductive Paint (Acetone based paint included in this kit type)
- Acetone for thinning paint/brush cleaner
- Small spring clips and/or alligator clips
- Gloves
- Paint brush
- Paper towel for blotting excess paint from your brush
- Opened large paper clips - turned into an S hook shape
- Drying rack
- A tray, a mat, or plastic sheeting to protect your workspace from paint drips
- Wide mouth jar with an airtight plastic lid (for creating a dipping container that is separate from your original paint)
Supply list with Amazon links: EnchantedLeaves.com/Electroforming
In this last prep stage, you will make your design conductive by coating with your conductive paint, which can be used to dip or paint on. Be sure to work in a well ventilated area and wear gloves. Always keep your conductive paint well sealed when not in use. Mix and shake well before each use. If the paint jar begins to dry out, or the consistency is too thick, you can add a thin layer of acetone.
It is very important that you DO NOT OVER DILUTE your paint! Over thinning can destroy your paint’s conductivity.
Application Methods
When painting with a brush, make thin, even strokes, keeping in mind that any texture may show up in the finished electroformed surface. Wherever the paint is applied is where the copper will be in the finished result. It can cover the whole piece, or just portions of it. If you paint just a portion, make sure each end touches another part that is conductive, as the electric current will need a path to flow through.
Lightly thin if necessary by periodically dipping your brush in the acetone/paint thinner between dipping in the conductive paint. Over thinning can destroy your paint’s conductivity. Use spring clips or alligator clips to help hold up the piece while painting.
For the dipping method, add some paint into separate wide mouth container that has an airtight lid. Thin very lightly only if necessary with a little bit with isopropyl alcohol(make sure it is at least 90%).
Hook an opened paper clip to the loop of your piece and use the other end as a handle to dip your piece directly into the container. Hang it on the drying rack and catch any excess sealant that builds up at the bottom or edges of the piece.
When using the paint in a spray brush, hold your piece upright on a combination of spring clips and alligator clips and spray from about 9 to 12 inches away to ensure an even coat. Work in an area that is free from dust and wind.
Drying and Additional Coats
Apply 2 to 4 thin coats of your conductive paint. Allow your paint to dry at least 20 minutes before applying any additional coats.
Although conductive paint seems to dry instantly, allow 24 hours of dry time before electroforming. Do not directly touch the surface of your piece, as skin oils or dirt and residue will create unplated spots while your piece is electroforming.
Clean Up
To clean off your paint brush swirl it in a jar of acetone and wipe clean on a paper towel or rag. Clean up any spills and messes with acetone.
:: Step 5 - Electroforming ::
Materials needed in this step:
- 3amp DC Power Supply
- Test Lead Wires
- 1000 mL Copper Electroforming Solution
- 1000 mL Beaker
- 8 or 10 gauge Clean, Bare Copper Wire Coil
- 26 gauge Conductive Suspension Wire
- Bus Bar or Wooden suspension
- Wire Cutters
- Jewelry Pliers
- 2 Spring Clips
- Lipped Tray
- Safety Glasses
- Gloves
- Distilled Water
- Paper or Shop Towels
Supply list with Amazon links: EnchantedLeaves.com/Electroforming
Workstation Set Up
Select a flat workspace to set up your electroforming station. Plug in your lead wires to your power supply, and turn the amperage knob all the way to the left (off) and volt knob all the way to right (on). Set your cleaned beaker inside a lipped tray.
Slightly open the copper coil, place inside your beaker with the top end of the wire stick out over the edge of the lip. The coil should last you through several electroforming jobs, depending on the size and thickness needed.
Wearing your safety glasses, carefully pour your copper electroforming solution into your beaker with the copper coil inside.
Prepare Your Piece
Cut a piece of your thin gauge wire to loop around your wooden suspension bar and then using your pliers create a “s” hook the other end of the wire onto your prepared piece(cathode). It should be long enough to fully submerge into the solution, but not too long that it will touch the bottom of your beaker. Remember to wear gloves when handling your painted piece, otherwise you may experience conductive resistant spots due to skin oils from your fingers.
Power Up!
-
Attach your red lead wire clip to the end of the copper coil(anode) that is slightly sticking out of the beaker, and the black lead wire clip to the top of the cathode suspension wire that is wrapped on your suspension bar. Do not let the clips directly touch the liquid solution.
-
Switch on the power supply and make sure the numbers are all set to 0 (amp knob all the way to the left/off, volt knob right/on).
-
Submerge your suspended piece into the solution bath, so that it is evenly placed in the center. Use a small spring clamp on each end of the wooden suspension bar and clamp it to the lip of the beaker.
-
Slowly turn the amperage knob to the right until your numbers begin to move up to the calculated amps per square inch of surface area to plate.
(get the number you calculated in Step 1/Design & Prep, 0.1 amps x sq inch of surface area)
- Make note of what time you started
Wait and Monitor
Next copper will gradually form over your piece. Depending on the size, and your desired thickness, this can take several hours.
The amperage number may drop a bit while the first layer of copper is covering the surface of your piece. This is normal, as the total surface area is increasing as the copper spreads over the areas that are conductive. When this happens, slowly increase the amperage knob to keep it at the correct number.
Gently giggle the wire if you notice any air bubbles on your piece, as they will prevent plating from happening on those spots if not removed.
Check on it every hour or so, making sure that the texture is how you want it.
Rinsing Off
Once you have the desired thickness of copper deposit on your piece, remove it from the solution bath and rinse it in a container of distilled water. You can run it through tap water, but only if you don’t plan on putting it back into the the tank again(minerals in tap water can contaminate the plating solution). Don’t leave any water spots, as it can discolor the copper as it dries. If its happens, it can easily be cleaned off.
Notes on Consistency
Your piece will sometimes come out of the bath looking pink/salmon colored, with a matte texture. DON’T WORRY! It will shine to perfection with a few simple tools once you are finished and happy with the thickness of your plating.
If there are any bare patches on your piece that didn’t plate, pull it out and rise it off in distilled water. Pat dry or use a blowdryer to get all all the moisture out and then repaint with your conductive paint on the spots with that are not plating. Let the paint fully dry before submerging into the plating solution again.
Make sure that your suspension wire and piece don't touch the anode/coil wire. If you are using a metal bus bar as your suspension bar, make sure that it also doesn't touch the top of the coil either. If this accidently happens, you’ll notice there will be no plating happening! If you don’t have a bus bar with hammered ends, then use a spring clamp on both ends of the bus bar to keep it from rolling.
Having your amp numbers too high will “burn” your piece, turning it brown and flakey, or give you bumps and other unwanted texture. So when in doubt, lower amps are better.
If the temperature is below 65 degrees fahrenheit, then you’ll need to keep your solution warmer by setting the beaker on top of a heating pad(on low! Don’t melt the beaker!) to prevent plating issues due to cold temperatures.
You can use anything for a bar that goes across the top of the beaker that you’ll hook your piece onto, as its purpose is just to hold up your cathode up from dropping into your electroforming solution.
If you prefer to use a metal bus bar, you can cut a piece of 8 or 10 gauge bare copper wire. This method is useful if you plan to hang multiple pieces off it, as the entire bar is conductive. You can either hammer flat both ends of the metal bus bar wire.
Also consider adding some means for agitation to your tank setup. A simple fish tank bubbler will suffice or a small air pump with a tube held at the bottom of the tank. The bubbles will cause a stirring action within the bath that helps the copper ions coat evenly over the surface of the object.
:: Step 5b - Clean Up ::
Materials needed in this step:
Supply list with Amazon links: EnchantedLeaves.com/Electroforming
If you aren’t planning on electroforming any other pieces that day, you’ll want to filter and store your solution back into solution again to prevent evaporation and deterioration of your copper coil.
Filter
Place a few layered filters inside your funnel and place it inside your empty electroforming solution bottle. Wearing your safety glasses, carefully and slowly pour your solution into the bottle through the filter lined funnel. Repeat if necessary.
Top off your solution with distilled water if the liquid level is significantly less than when you started.
Rinse
Thoroughly rinse out your beaker and coil and fully dry them with a shop towel to ensure there is no residue left from the tap water.
To be environmentally responsible, heavily dilute any remnants in your beaker down to a clear liquid before allowing anything to drain down the sink.
Scrub
Your coil will likely be dulled down in color and look dingy. Use a green scouring pad under water to clean off the residue and restore the copper shine. After fully rinsing, completely dry it off. You may use a brass brush or steel wool to shine it even further.
An 8 or 10 gauge coil should last you through many pieces of small/average size. You will notice it will get thinner after use until it breaks off at the weakest point.
Scrub off any residue or buildup that is on your lead wire clips. Keeping these clean will ensure a good connection when electroforming.
:: Step 6 - Polishing, Patinas & Finishes ::


Materials needed in this step:
- Scouring Pad, Brass Brush, Dremel with a Wire Brush Wheel attachment, or Steel Wool
- Tumbler with Polishing Medium(optional)
- Face Mask
- Safety Glasses
- Gloves
- Liver of Sulfur & Hot Water(optional)
- Alcohol Ink or other dye solution (optional)
- Shop Towels
Supply list with Amazon links: EnchantedLeaves.com/Electroforming
It's quite easy to turn that flat salmony colored copper that you’ve likely pulled out of the tank into shiny penny colored copper. Always use safely protection such as a face mask, safety glasses, and disposable gloves.
Polishing Methods
A dremel with a wire brush wheel attachment will be the fastest and most effective method to get your piece to a high, smooth shine.
You may also use a green scouring pad, a brass brush, or steel wool.
A tumbler (rock polisher) with a polishing medium can also be used to polish large batches of items at once. Use a little water and a drop of soap as a lubricant when tumbling.
After you’ve finished polishing to your desired shine, you can either leave it in this color, which will be a raw copper or rose gold looking finish. You’ll need to seal it in(seen in step 7) to preserve this color and prevent natural oxidation.
Patina/Oxidation/Antiquing
Liver of sulfur creates a dark “antiqued” or oxidized look. It comes in a gel or powder form that mix with hot water. Varying water temperatures and water types can give blue, rainbow, or even gunmetal black tones to your copper.
Create shiny highlights using a brass brush, steel wool, dremel, or a polishing cloth. Water and baking soda can alternatively be used as a scrub paste to clean and make highlights.
Black Max, Brass Black, and Blacken-It are types of selenium dioxide solutions that also achieve a quick oxidation on metals.
Color Dying
Alcohol ink dyes can easily be used to dye your metal any color you wish. Mix it with with a sealant such as polyurethane or clear nail polish to seal in the dye color, without making it run.
:: Step 7 - Preventing Oxidation::
Materials needed in this step:
- Your choice of sealant:
- Gloves
Supply list with Amazon links: EnchantedLeaves.com/Electroforming
What Causes Oxidation?
Natural oxidation can occur when your copper piece is exposed to moisture, and natural elements. This copper patina is what causes the “green mark” that can rub off on to skin when worn as jewelry.
Oils and sweat from skin, as well as perfumes, lotions, bug sprays, sunscreen also causes unwanted oxidation and patina build up. Always avoid wearing any copper jewelry in the shower, pool, beach, or when sleeping.
If you wish to keep your copper design from naturally oxidizing and tarnishing, you can use some sealants to either slow the process, or prevent it from happening all together.
Sealants
Polyurethane lacquer and Protectaclear both come in a liquid or a spray form, and in glossy or matte finishes. Hang dry after application, and apply additional coats, if needed.
Clear nail polish is also widely used as a quick and inexpensive sealant, especially for the inside of copper rings. Gel style polishes make a great and strong sealant.
Another simple and popular sealant product is Renaissance Wax. This is particularly good to use if you don't want your design to have a glossy shine or a slick surface. Work in a well ventilated area and use disposable gloves and a soft rag or shop towel to buff the wax into the copper.
These methods may wear down over time, so for a more permanent solution, use clear resin as a sealant.
Oxidation Removal
Unwanted tarnishing and natural oxidation on copper can easily be removed by creating a scrub of salt and white vinegar.
Rinse well, dry, and shine highlights with a polishing cloth.
You can also use fine steel wool, a brass brush, or a dremel with a wire wheel brush to buff and clean unwanted oxidized copper.
Use a sealant to protect your cleaned design.
:: Tips & General Guidelines ::
Electroforming takes some trial, error, tweaking, and a lot of patience! Here are some helpful notes that I've learned over the years
- Over time, your solution's electrolytes will become depleted. You can then use a new solution, or replenish with acid, brighteners, and distilled water to restore the pH balance
-
If your piece is lightweight, you may experience some frustrating “floating” with your piece and wire. You can experiment with other techniques of floating prevention such as suspending a heavier non conductive object at the bottom of your piece(such as a piece of glass), or creating a sort of “cage” that slightly spirals around your piece that prevents the bottom of it floating up to the surface
- If your power supply has the option of constant current- keep it switched on
- A safe setting is .1 amp per square inch of your piece to be plated (length x height x .1)
- When in doubt, "Low and Slow" is the way to go
- If you see any air bubbles on your piece(from air that was trapped in crevices during initial submersion into the plating tank), gently jiggle your wire until you see all the bubbles shake off. You might want to switch off your power supply, in case jiggling tampers with the connection. Failure to do so during the beginning will cause pockets of unplated spots, as it does not plate under the bubbles
- 95% of the time your piece will appear pink/dull/matte- and that is very normal and common. It will shine beautifully with steel wool, a brass brush or a dremel with a wire brush wheel
- Titanium wire helps prevent floating of lightweight pieces in your plating tank, and is also is less prone to fusing the suspension wire to the piece
- Always use distilled water when cleaning your brushes, tank, etc, to prevent contamination
- Yes, you can plate multiple pieces at once. You'll need to make sure they are all connected on the same wire, or at least all on an conductive bus bar, and you'll have to increase your amps accordingly(.1 amp per square inch). Only attempt after you're more confident in your plating practice
- To create a lacy or filigree look to your leaves, you will need to boil them in baking soda to remove the fleshy pulp on them and reveal the skeleton structure. Its best to do this when the leaves are picked fresh.
- Bake ¾ of a cup of baking soda at 300 degrees for about a half hour(this turns it into washing soda/sodium carbonate)
- Boil 2 cups of water in a large pan, add your washing soda, stir
- Bring the boil down to a simmer and add your leaves. Let them simmer for about 1.5 hours, adding any extra water as needed
- Strain and gently rinse with water
- Next, you’ll use a paint brush and clean water to gently remove the pulp of the leaf, revealing the veins. You may need to do this to both sides, depending on the leaf
- Blot with a paper towel and flatten in a book to fully dry
- When applying conductive paint to your leaf, paint it directly on a flat surface and blot with a brush to retain the lacy appearance
:: Health & Safety Information ::
Copper Electroforming Solution
Met. Corr.1 H290 May be corrosive to metals
Acute Tox. 4 H302 Harmful if swallowed
Skin Irrit. 2 H315 Causes skin irritation
Eye Dam. 1 H318 Causes serious eye damage
- Keep only in original container
- Do not eat, drink or smoke when using this product
- If in eyes: Rinse cautiously with water for several minutes. Remove contact lenses, if present and easy to do. Continue rinsing
- Immediately call a POISON CENTER/doctor
- IF ON SKIN: Wash with plenty of water
- If skin irritation occurs: Get medical advice/attention
- IF SWALLOWED: Call a POISON CENTER/doctor if you feel unwell
- Absorb spillage to prevent material damage
- Store in corrosive resistant container with a resistant inner liner
- Wear protective gloves/protective clothing/eye protection
- Wash hands thoroughly after handling
- Avoid release to the environment
- In case of fire: Use dry chemical, carbon dioxide, chemical foam, or water spray to extinguish
- IF ON SKIN (or hair): Take off immediately all contaminated clothing and wash it before reuse. Wash with plenty of water
- If skin irritation or rash occurs: Get medical advice/attention
- IF INHALED: Remove person to fresh air and keep comfortable for breathing
- Call a POISON CENTER/doctor if you feel unwell
Conductive Paint / Paint Thinner & Brush Cleaner
H225: Highly flammable liquid and vapor
H319: Causes serious eye irritation
H317: May cause allergic skin reaction
H336: May cause drowsiness and dizziness
- Keep out of reach of children
- Keep away from heat, hot surfaces, sparks, flames, and other ignition sources. No Smoking
- Keep container tightly closed
- Do not breathe mist/vapors/spray
- Use only outdoors or in a well-ventilated area
- Do not eat, drink or smoke when using this product
- Use explosion-proof electrical/ventilating/lighting equipment
- Wear protective gloves/protective clothing/eye protection
- Contaminated work clothing should not be allowed out of the workplace
- Wash hands thoroughly after handling
- Avoid release to the environment
- IF exposed or concerned: Get medical advice/attention
- In case of fire: Use dry chemical, carbon dioxide, chemical foam, or water spray to extinguish
- IF ON SKIN (or hair): Take off immediately all contaminated clothing and wash it before reuse. Wash with plenty of water
- If skin irritation or rash occurs: Get medical advice/attention
- IF INHALED: Remove person to fresh air and keep comfortable for breathing
- Call a POISON CENTER/doctor if you feel unwell
Polyurethane Lacquer
H372: Causes damages to organs (lungs, central nervous system, inner
ear) through prolonged or repeated exposure by inhalation
H319: Causes serious eye irritation
H315: Causes skin irritation
H317: May cause allergic skin reaction
H336: May cause drowsiness and dizziness
- Wear protective gloves
- Wear eye or face protection
- Wear protective clothing
- Wash hands thoroughly after handling
- Keep container tightly closed
- Do not breathe mist/vapors/spray
- Store locked up
- IF ON SKIN (or hair): Take off immediately all contaminated clothing and wash it before reuse. Wash with plenty of water
- If skin irritation or rash occurs: Get medical advice/attention
- IF INHALED: Remove person to fresh air and keep comfortable for breathing
- Call a POISON CENTER/doctor if you feel unwell
Affiliate Disclaimer: I am a participant in the Amazon Services LLC Associates Program, an affiliate
advertising program designed to provide a means to earn fees by linking to Amazon.com products


